Monday, May 25, 2020

Raised bed installation, Part 5 - Fini!

The vegetable portion of my grand garden scheme is finished!

Lest we forget, here is the area in question, June 2019.


More recently:


And now...


I can't wait to get the tiered gardens done now, so that the whole hill looks as nice as the finished section!

I made a quick squash trellis out of an old, bent piece of hog panel I had on hand.  (I am Yankee, see me hoard.)  The step-in posts I use for temporary electric fencing for the mules worked perfect as braces to hold it on an angle.  I also used them to hold up the cucumber trellis.


That's nearly 3 yards of bark mulch, which was much easier to bucket up the hill than dirt.  My only concern is a heavy downpour sending it all down the hill...we'll see what happens.

I managed to plant all of my peonies along the wall, and mulched around those.  I didn't use weed block around them, just laid out newspapers and plopped the mulch on top.  That stump sitting on top of the big rock is a sumac that I was able to pull by hand.


Yup, definitely happy.
And sore.
And a lot lighter in the wallet.

Worth it!

Sunday, May 24, 2020

Raised bed installation, Part 4...oh, my aching body.

Well, the last two beds are in and filled.  One is even planted, so...yay.  I'm aching from stem to stern.  Pick-axing this stony soil, hauling buckets of dirt and manure uphill, crouched over raised bed kits furiously trying to put them together, pounding landscape pins into the weed block, only to hit a rock and have the pin bend into impossible shapes...thank goodness the end is sight, because I need a rest.  All that's left to do is put up a trellis for the squash plants and spread the bark mulch when it arrives.  Of the four metal raised beds, I only installed the two larger ones.  I decided to reserve the two smaller beds for the shade plants that I'll use as stock plants (or as I like to call them, "mother plants").  I must say, I'm pretty pleased with the setup, even if it's a little different than I'd imagined.


Once the bark mulch is down, I'll move the window box radishes under the cucumber arch. 
So far I've planted onions, scallion, cherry tomatoes, beefsteak tomatoes, horseradish, bell peppers, one chili pepper, celery, tomatillo, cauliflower, strawberries, sugar snap peas, broccoli, lettuce, radish, cucumber, herbs, and once the trellis is done I'll plant a summer squash and a zucchini.  Whew! 

A word on the metal beds - stick with wood.  The smaller ones aren't bad, but the metal is thin and once filled, tends to bulge the sides on the longer ones.  There are metal rods for the center that are supposed to pull it together, but they're very weak and I've snapped two of them already.  I like the look of them, but the durability is just not up to par. 

So now it's on to the final stage!  *waves hands weakly*

Friday, May 22, 2020

Raised bed installation, Part 3

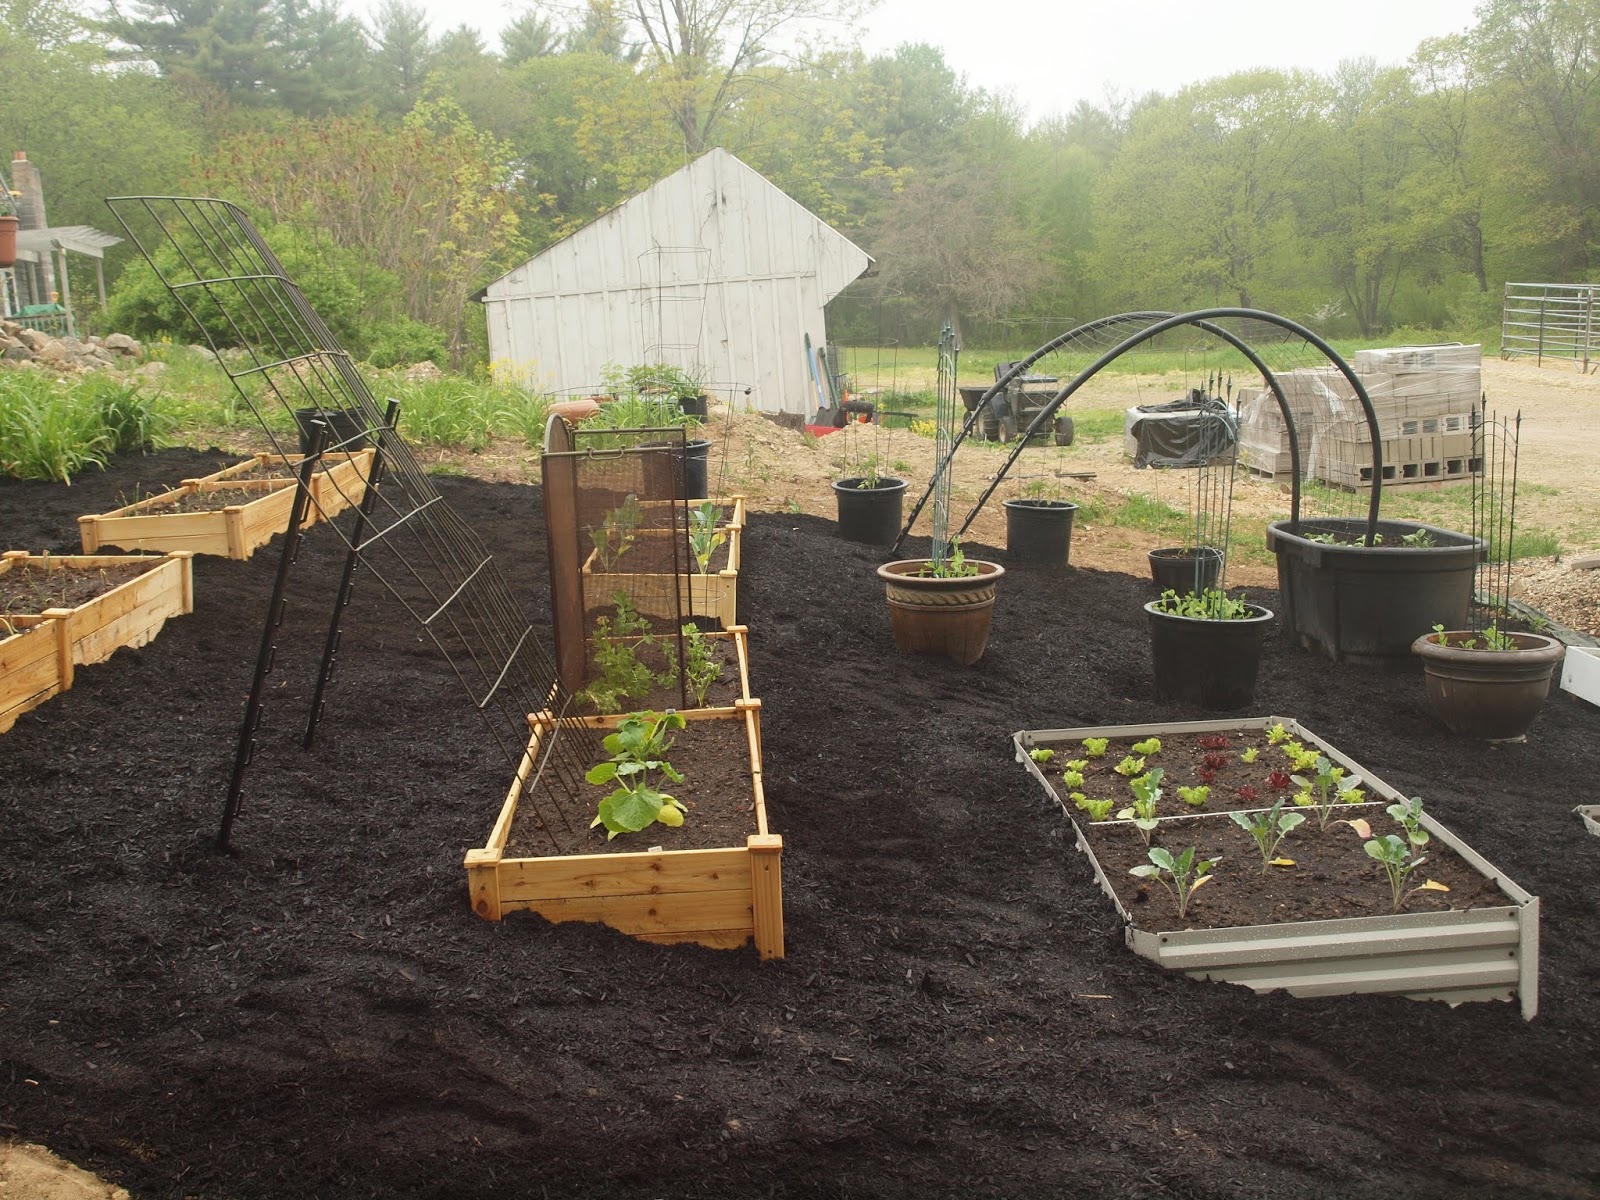
I'm about half way there!  Here's an interesting dilemma: I have more space than I expected, and I haven't even put in the last four beds.  I may have to grow more vegetables...

The last few days have mostly been about putting down more weed block and getting my cucumber tank moved.  I have always used a hugelkultur type approach to larger containers.  Chunks of wood and sticks in the bottom, a layer of natural composty stuff (leaves, the nasty hay left over in the mule paddock after winter, pine needles, etc.) over that, a layer of aged mule poo, a layer of dirt, and then any soil amendments I may think necessary mixed in (peat moss, vermiculite, etc.).  I think I've explained the theory before, but basically the wood rots slowly and helps to create pockets of air and moisture, the composts rot and help to create heat, and it creates a nutrient filled bed of rich organic materials.  Eventually. 

When I began to deconstruct my stock tank garden, one of the things I was pleased to find was the layer of natural compost had really broken down nicely.  I dug everything out except the wood and moved the tank to the new garden, then added some more mule poo and replaced the soil.  Hopefully this will be the last time I have to disturb the natural decaying process in this tank.

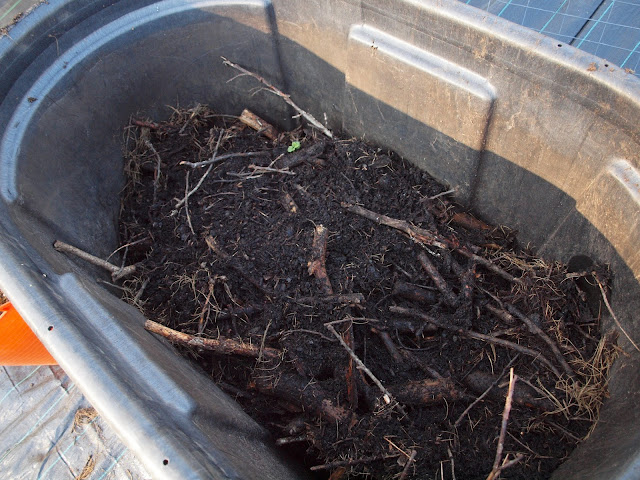
You can see how nicely the organic materials have broken down over the sticks. 

Mule poo in, now covering with soil.  I'll fill it nearly to the top.
Once it was filled, all I needed to do was add the arch (welded wire and plastic water pipe zip-tied together - it's lasted over 5 growing seasons so far!) and my cucumber plants.  I think once the bark mulch is down, I'll put a small bed underneath the arch for a second planting of one of the cool weather crops.  I'm not sure what, but by the time I plant, the cucumber vines will provide dappled sunlight for a more shade tolerant crop like lettuce or radish.  I'll plant sweet basil in front of the cucumbers to utilize the extra space in the stock tank.  I did that last year, and it worked really well.


At the top of the slope I have the 3 cherry tomato plants in containers, and I've started placing peony plants to see where I'd like them planted.  I am going to try to find a hardy lavender to also plant along the front of the stone wall. 


I've given up trying to dig up all the day lilies my mother had tossed over the bank and allowed to run free.  They'll add a little color in mid to late summer.  I also finally planted my horseradish plant.  This is a piece off a plant I've had for years.  My Grampy gave me a cut top off his plant and told me to put it in water until it had a good root system, then plant it.  I did just that, and the plant thrived.  I've taken a piece of that plant with me every time I've moved.  It's a connection to my Grampy, and horseradish is also a pretty plant.  It has delicate white flowers, and paired with the cream colored peonies, is really quite beautiful.  Plus I love those Jurassic sized leaves.

horseradish surrounded by a stone circle so I don't step on it
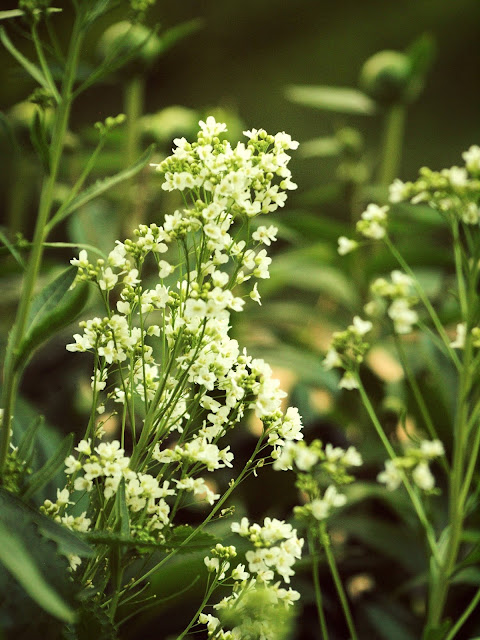
horseradish flowers at my previous house

peony surrounded by horseradish flowers

Sunday I have a load of bark mulch coming, so the plan now is to set up the last of the raised beds today, and get the weed block down in preparation.  Busy, busy! 

Tuesday, May 19, 2020

Raised bed installation, Part 2

The last bed is set and I'm ready for fill!  Please don't judge my ability to level; it was nearly impossible to set these perfectly square to themselves or each other.  Rocks, rocks, rocks.  This is why my mother named the place Stoneridge Farm!  Every time you think you've got easy digging, along comes a VW sized boulder to tell you differently.  As far as I'm concerned, this is good enough to grow stuff.


The first layer of fill is aged mule poo.  After that was in, I added a layer of the 50/50, a layer of peat moss, and another layer of 50/50.  Once the layers were fluffed and mixed (the peat moss helps lighten the soil so it drains better) I was ready to plant.  Finally!


Green peppers are in the left hand bed, scallions are in the last section on the right, and the rest of the right hand beds are onions.  This is my first year growing onions, and I'm already weeks behind schedule. 


I did cheat somewhat this year.  I decided to buy started pepper and tomato plants since I didn't do any seed starting of my own.  I traded a neighbor 3 cherry tomato plants for 3 cucumber plants, so that left me with 3 cherry tomato plants, 6 beefsteak tomato plants, and 6 green pepper plants.  The gentleman I purchased the plants from also threw in a Tumbling Tom tomato; this variety drapes and is perfect for hanging baskets.

I've started laying down the weed block to (hopefully) prevent the bittersweet from growing back.  Once the rest of the beds are assembled and in, I'll cover the weed block with bark mulch. 


The beefsteaks are in the pots along the side, and the Tumbling Tom is in the pot on the shepherd's crook.  Not a bad start, if I do say so myself.

Sunday, May 17, 2020

Raised bed installation, Part 1

The bank has been cleared of the remaining brush, more roots have been pulled, rocks have been picked and raked (and yet, there are always more), and the bank is ready for phase one of the garden. 


Bonus - I found three patches of Jack-in-the-Pulpit plants that had been growing in the underbrush.  I dug them up and will replant them in the shade garden.


I ordered a bunch of raised bed kits last year, and put four of them together so far.  These cedar raised bed kits were from a website called Best Choice Products.  It's kind of an overstock-type site, and they have limited amounts of items.  I'm all about saving money, so I created an account and now earn reward points with every purchase.  Points can be used as discounts toward future purchases.  They don't always have the lowest prices, but if you time it right you can get some pretty good bargains.  These beds are 8'x2', and cost about $40 each.  Now they're at $82 each, so I did pretty well.  BCP is also part of the Rakuten network, which I also subscribe to, so I get cash back with every purchase.  And now, back to the project...

Behold!  Beds.


First I set them on the bank until I found the configuration and spacing that I wanted.  I left quite a bit of room between the beds so I can get my garden cart around them.


I then set out digging into the bank (hello pick-axe, my old friend) to level out the bed areas.  This was my original plan for the other section, but ambition is a cruel mistress and, well...blocks.  I'm now torn between using this area for veggies or for perennials.  I think for this year at least, I'll use these beds for produce.


Three of the four beds done.  Once the last one is in, I'll fill them with a mixture of the 50/50 (soil & compost) I had delivered and peat moss (to lighten the 50/50).  I have onions and scallion sets that have been patiently waiting to be planted that will go in the back beds.  Then it's on to the other beds, but that's for another post.

Sunday, May 10, 2020

Welcome May!

Yes, welcome.
Let's have a snowstorm to celebrate.

*sigh*


It could have been worse.  It could have been the 6-8 inches of snow some places wound up with.  We ended up with almost 3 inches of fluffy snow, and as soon as it stopped the winds kicked up like nobody's business.  By late afternoon, there were only small patches of snow left, but it's been bitter cold.  Hey, if it kills off some of the black flies, I'm all for it!


Monday, May 4, 2020

Tractor Envy

I have a son-in-law who is, without a doubt, psychic.  It's as though he'll stop suddenly and say, "There is a strange vibration in the force...mummy-in-law needs me!" and voilà!  He appears.

Such was the case yesterday, when I began the tedious job of clipping out the bittersweet from the remaining trees.  I was only a few hours into my chore when Zac called, and within five minutes after that he pulled in with his big ol' tractor in tow.  My savior!  He easily pulled the stumps from where I had cleared, and then made short work of the remaining trees.  I didn't even have to pull the bittersweet!


Even the mules were impressed.


As a bonus, he also compacted the brush pile. 


I was definitely envious of what his tractor could do versus what Reputa can.  But I can't disparage her too much; my little tractor has saved my back more than once, so she's still worth her weight in gold to me.  *pats Reputa lovingly*

And in the end, this is what remained.


I admit, I nearly wept with joy.  In a few short hours Zac the Tractorman did what would have taken me days.  All that's left for me to do is cut the last of the briar canes and rake a bit.  It's amazing how open everything looks now!  I can't thank Zac enough.  He's a good doobie.  😊


Sunday, May 3, 2020

Chainsaw Massacre

As a general rule, I'm not the sort of person who is allowed to use anything that runs off a motor, has more than two working parts, involves propane, or has a pointy end.

That being said, I just treated myself to my very first chainsaw.

It's not a massive "let's clear cut some old growth forest" saw, just a small battery operated rig.  You know, 40volts, 12" blade...this one's for the laaaadieees type of thing.  I'm happy to report after nearly two hours of attending the Rowe School of Toolmanship (thank you, Neil) I cut about ten small trees and was able to retain all my appendages.  Huzzah!

Saturday clearing, now with tree removal.


I'm getting there!  I'm leaving long stumps behind because my very kind neighbor has offered to come over and pull them with his machine.  This way I won't have to worry about them growing back.

The bittersweet vines are a different story.  That line of disturbed soil in the above photo was one long root that I managed to pull by hand.  The vines are laid out along the ground like extension cords leading to an over-lit Christmas tree, and are so entangled in the tree tops that I have to pretty much cut them all out before taking the saw to the trees for safety's sake.

most of these vines are actually rooted into the ground

you can see how thick the vines grow

bittersweet vines will actually kill trees

these are all vines that have grown throughout the tree tops

And my parting shot is one of the brush pile, which is getting a little out of hand.  I guess it's now a natural fence of sorts.  I'm thinking once the pile of topsoil has been used up and the driveway is sorted out, this area would be a nice little paddock extension for the mules.


Yessssss.  You will extend my paddock, human.  EXTENNNNND.